
Let me start by telling you how I came across the idea. I was chatting with a vendor at a show who had the most luscious "straw dyed" fabrics. She explained her process which included dispersing the dye using a drinking straw. She was very open about her technique and said she too had learned by talking with people and experimenting. She encouraged me to go home and try it for myself. Let's just say I must have missed part of what she said because her technique did not work for me! I didn't like using a drinking straw and wasn't able to wear my "dust mask" while working with the dye (this is a must for everyone as the dye powder is very fine and easy to breath into your lungs). When I saw my first results to me it looked like confetti exploded across my fabric which is why I coined the technique "confetti dying".
 |
| Your must-have tools include a dust mask, protective apron, dye, latex gloves and a mesh tea strainer 1) Soak fabric in soda ash and water for at least 30 minutes 2) Spoon dye powder into mesh tea strainer and gently sprinkle dye across the fabric surface. Use even strokes to avoid clumps of dye in one area... you need a light touch. 3) Once you have the dye powder in place it's time for the real fun to begin! Below I'll explain how to get different results... if you come up with something new please share! |
 |
| The fabric was laid on a flat surface and the dye powder sprinkled across the fabric. I dragged my finger through the dye creating spirals. Next I took a spray bottle filled with soda ash and water and sprayed the entire fabric surface. The spray gets the dye molecules moving and they begin to spread out and wander! |
 |
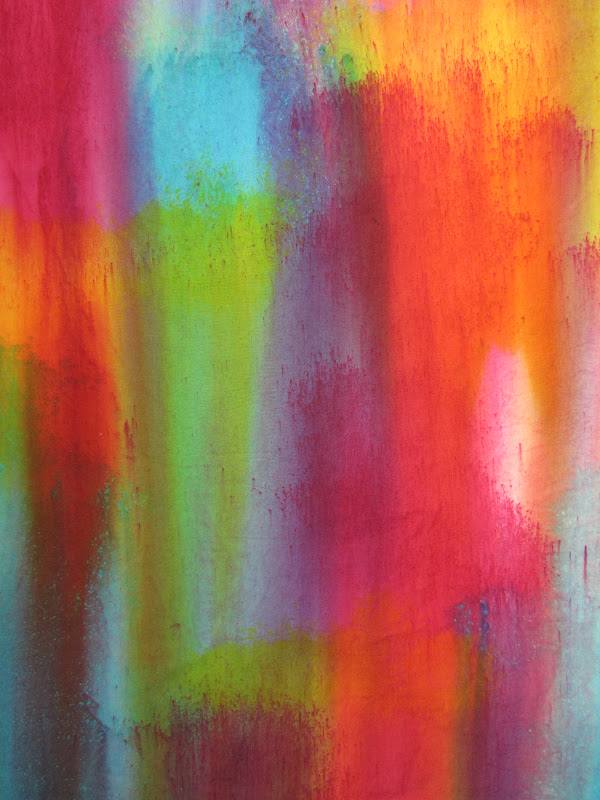
| Above is a detail shot of what I mean about the dye molecules wandering across the fabric surface. Because the dye isn't a liquid the individual molecules don't always bond together which creates residual colors! |
 |
| The above picture shows the process of hanging the fabric up before spraying with soda ash and water. This is a very messy process so think about where you want to do this before you get in too deep... but messy is fun! Just as the previous description once the dye powder is sprinkled across the fabric it's time to spray with soda ash and water causing the dye to move across the fabric. |
 |
| Once you get comfortable with the process you can plan where you want to place the dye so when it runs together more colors are created. |
 |
| The above patterns were created by scrunching the fabric. Again, once the dye powdered is sprinkled across the fabric and the surface is sprayed with soda ash and water you need to scrunch the fabric and leave undisturbed for at least a couple of hours.
This technique leaves more dye in the fabric than typical water immersion techniques so be prepared to spend a little extra time rinsing out your fabric before washing. I usually rinse the fabric under cold running water just to get the bulk of it out. Next I fill the sink with cold water and swish the fabric around emulating the agitation of a washing machine. When the dye is mostly rinsed I toss it into the washing machine on the hot cycle with Synthrapol... voila... you have now confetti dyed!
You can't make a mistake with any of these methods so be free to experiment!
|
What brand of powdered dyes could I use to create this technique on silk and wool, since soda ash can be quite harsh on protein fibres? Thanks,
ReplyDeleteVanessa