 |
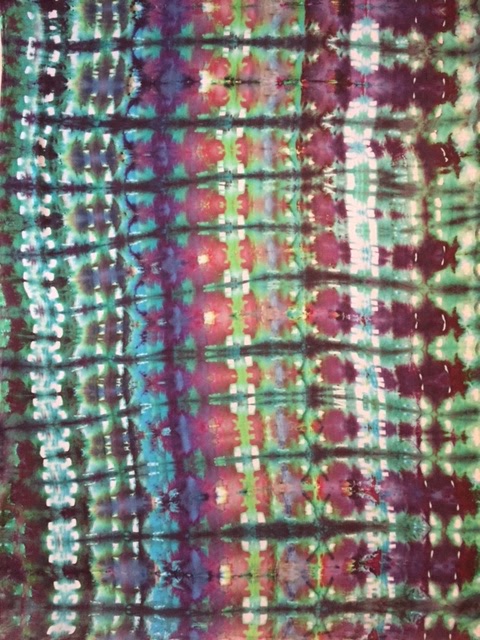
| Seattle 39" X 24" |
 |
| Detail - artists hand dyed cotton, cheese cloth as well as deconstructed screened fabric |

|
| Seattle 39" X 24" |
|
| Detail - artists hand dyed cotton, cheese cloth as well as deconstructed screened fabric |
 |
| #1 SOLD |
 |
| #2 |
 |
| #3 |

 |
| Here we sprinkled dye powder on the fabric and pulled print paste across. |
 |
| We have some interesting results! Barb placed the foam circles and other objects from her sprinkled piece onto plain fabric soaked in soda ash and water. I don't have a photo but it turned out really cool! My piece is over to the right. You can just make out a leave I placed as a mask... not exactly a dramatic look! Oh well - I learned somethings which was the point! |
 |
| Here Barb is showing me how to use a foam roller and wooden blocks for a cool print! |
 |
| The roller needs to be really saturated to get a strong print. |
 |
| Barb said she got the roller at Home Depot! |
 |
| Barb is pulling the print paste across the screen. Deconstructing screens means with each print the screen slowly releases the design until it's all gone! |
 |
| It's a time consuming technique due to creating the screens first and allowing the thickened dye to dry... but the results are so fun! |
 |
| When got home I got busy with the print paste and screens - here are my results! |
 |
| This piece had too much empty white space for my taste. I decided to paint a light wash across the surface which made the overall design feel more substantial. |


 |
| I love using clamps to keep the fabric folded tightly which creates lovely designs! |
 |
| In addition to clamps I use plastic balls & rubber bands for another type of look! |
 |
| Snow is piled up and dye scattered about - now the waiting begins! |


 |
| I initially sponge painted leaving large areas of unpainted fabric showing. Eventually I started to drip paint from the top edge allowing it to run down. I rotated the board so the drips covered the entire surface. |
 |
| After heat setting the fabric it was ready for more play time! |
 |
| Every studio should have a stash of bubble wrap! Using a thicker fabric paint I pressed gold and purple wrap across the surface until it felt right. |
 |
| This piece was an experiment in monotone. I lightly dragged the paintbrush across the surface. With a wet brush I went back and painted over with just water to get the black to meander a bit over the fabric. |
 |
| Although there are only 2 layers in this piece I felt "less was more". |
 |
| It was fun seeing the contrast between the black and red! |
 |
| I started by creating yellow vertical lines with the thickened dye. Next I laid the screen on top and pulled red and blue across the surface. I repositioned the screen moving it around until the surface was covered. |
 |
| Detail: 100% Cotton, 36.5" X 44", $25 |
 |
| For this piece I used yellow and blue thickened dyes. A lovely green meanders through the design as the colors mixed. Overall it a soft bright look. |
 |
| Detail: 100% Cotton, 36.5" X 44", $25 |
 |
| I used Seta Color transparent fabric paint. |
 |
| The heavier cotton is below and the lightweight cotton on top! |
 |
| The paint dried very light. I think the bamboo fencing may have absorbed more than I anticipated! |
 |
| Here is a detail of the bottom layer |
 |
| This is the top layer. It's 36" X 58" and with the lightness it makes a delicate panel! |
 |
| I'll go bolder next time now that I understand the mat better ... on to learning new things! |

 |
| After mixing up batches of thickened dyes I squirted the dye onto the back of a prepared screen. The bubble wrap and other materials were placed on top of the dye and left to dry. |
 |
| The screens are almost dried. I pulled off the bubble wrap and other items. The marks left behind will add an interesting element to the design (I hope!). |
 |
| Using a squeegee I pulled clear print paste across the screen. This step is repeated multiple times until the dried dye breaks down and we are left with a fun design. For the piece on the left I added a fern design using a Thermofax screen created by PGFiber2 Art. |
 |
| The process was time consuming due to the drying times. I love instant gratification but I'm going to keep at it experimenting and seeing how far I can push this technique! |
 |
| Have you ever tried deconstructing screens? |