Carol R. Eaton Designs

Carol R. Eaton Designs

FABRIC FOR SALE: click on pages below!

Showing posts with label Combining Techniques. Show all posts

Sunday, August 12, 2018

Channeling Cave Paintings!

My attempt to go back in time and create like a cave dweller! 
I created a piece of confetti dyed fabric that I thought was too plain. I lived with it on the design wall for a few days and thought it looked a little like stone.... mmm.. something prehistoric was creeping into my mind! 

I pulled out a thermofax screen created from pictographs. A few years ago on a family vacation near Moab, Utah I took a photo of the ancient symbols.
Terri Stegmiller custom made the screen - check out her shop!
The design is a group of antelope (?), horseback riders and a dog (?). I am not 100% sure what the story is telling but the area in Utah has many similar stories left behind by our ancestors. 
I wasn't quite satisfied so I laid the fabric on cement and rubbed it with Shiva paint sticks
I checked out cave painting books from the library to research the tools, colors and typical subject matter our ancient forebears recorded. It is amazing to me that in such a primitive culture artists were active in making marks and recording their stories in the caves they used as dwellings. 


Thank you ancient artists - I hope today's mark makers  do you proud! 

Tuesday, April 25, 2017

It's All About Fabric Painting!

I took some books on watercolor out of the local library. There is a huge difference between painting on fabric vs paper but I was inspired to rethink my approach. I decided to think about the fabric in terms of layers so after the paint dried more color was added creating a more complex design.

I initially sponge painted leaving large areas of unpainted fabric showing. Eventually I started to drip paint from the top edge allowing it to run down. I rotated the board so the drips covered the entire surface. 
After heat setting the fabric it was ready for more play time!

Every studio should have a stash of bubble wrap! Using a thicker fabric paint I pressed gold and purple wrap across the surface until it felt right. 

This piece was an experiment in monotone. I lightly dragged the paintbrush across the surface. With a wet brush I went back and painted over with just water to get the black to meander a bit over the fabric.

Although there are only 2 layers in this piece I felt "less was more". 

It was fun seeing the contrast between the black and red! 


Wednesday, June 29, 2016

One Color Palette + Paint Brushes, Plastic Balls, Ice Cubes & Bleach = A Variety of Results!

A fellow artist asked me to create some fabric in a specific color palette for an upcoming project. She was also looking for foliage and water colors. That just happens to be one of my favorite palettes so I was excited to get started! 

I choose 2 soft blues and 3 greens for the project. Since I wanted to offer a variety of designs to choose from I decided to incorporate low immersion dyeing (sort of!) and ice dyeing.The thing I'd like you to remember is that in every piece I used the same color combination yet the outcomes are very different from one another. 
Once I mixed the dye and water I opted to paint the dye onto the fabric surface.
After I washed the dyed piece I went back and discharged some color for a more "watery" feel! 

For this piece I tied small plastic balls randomly in the fabric. I painted the dye across the very lumpy surface! 

Detail of the "lumpy" fabric

This fabric was the most mellow in the project. I scrunched the fabric and brushed the tops of the raised surface with dye. 

Now you can see how the colors seem to shift.
This piece is ice dyed and the colors are deeper.

The exact same color combinations are being used but with the ice technique there are more unpredictable results! 

This is another ice dyed piece. Just like one of the other fabrics after I washed it I went back to discharge some color. 
We shall see if any of the fabrics catch the clients eye... and if not that's OK too! Each project is a challenge and allows me to stretch myself and grow as a surface design artist! 


Hope you are enjoying your summer and getting OUTSIDE to create beautiful art! 

Saturday, May 28, 2016

Fun with Fabric Folding!

I was playing with folded fabrics this week and then dipped them into the dye here and there. It was unplanned and evolved as the dyes were mixed. Next I mixed up some bleach and water for a little more fabric dipping. It was a fun and playful session! 

Black and Bronze!

Yellow over dyed with red! 

Yellow over dyed with blue!

Black & bleached!
 
Red & bleached... where did the red go - a bit too long in the bleach! 
It's very freeing to have an unplanned color-a-thon in the studio! There can be lots to learn when experimenting that can be applied towards a more planned project later. 

HAPPY CREATING! 

Sunday, February 28, 2016

Design in Honor of the Wind!

We had such high wind gusts the other night! It sounded like a train was coming... yikes! The next day I found this stencil of a wind blown tree - I'm sorry but I don't know the name of the artist who created it. I screened the stencil onto cotton using thickened dye... but it needed more! Next up I painted the surface with thinned fabric paints - but still something was missing. I carved a stamp of wind blown leaves. I think I'm done but it still might need a little something more... maybe flecks of paint?


What do you think is missing? Do you have a suggestion?!

Thursday, February 4, 2016

Combining Surface Design Techniques!

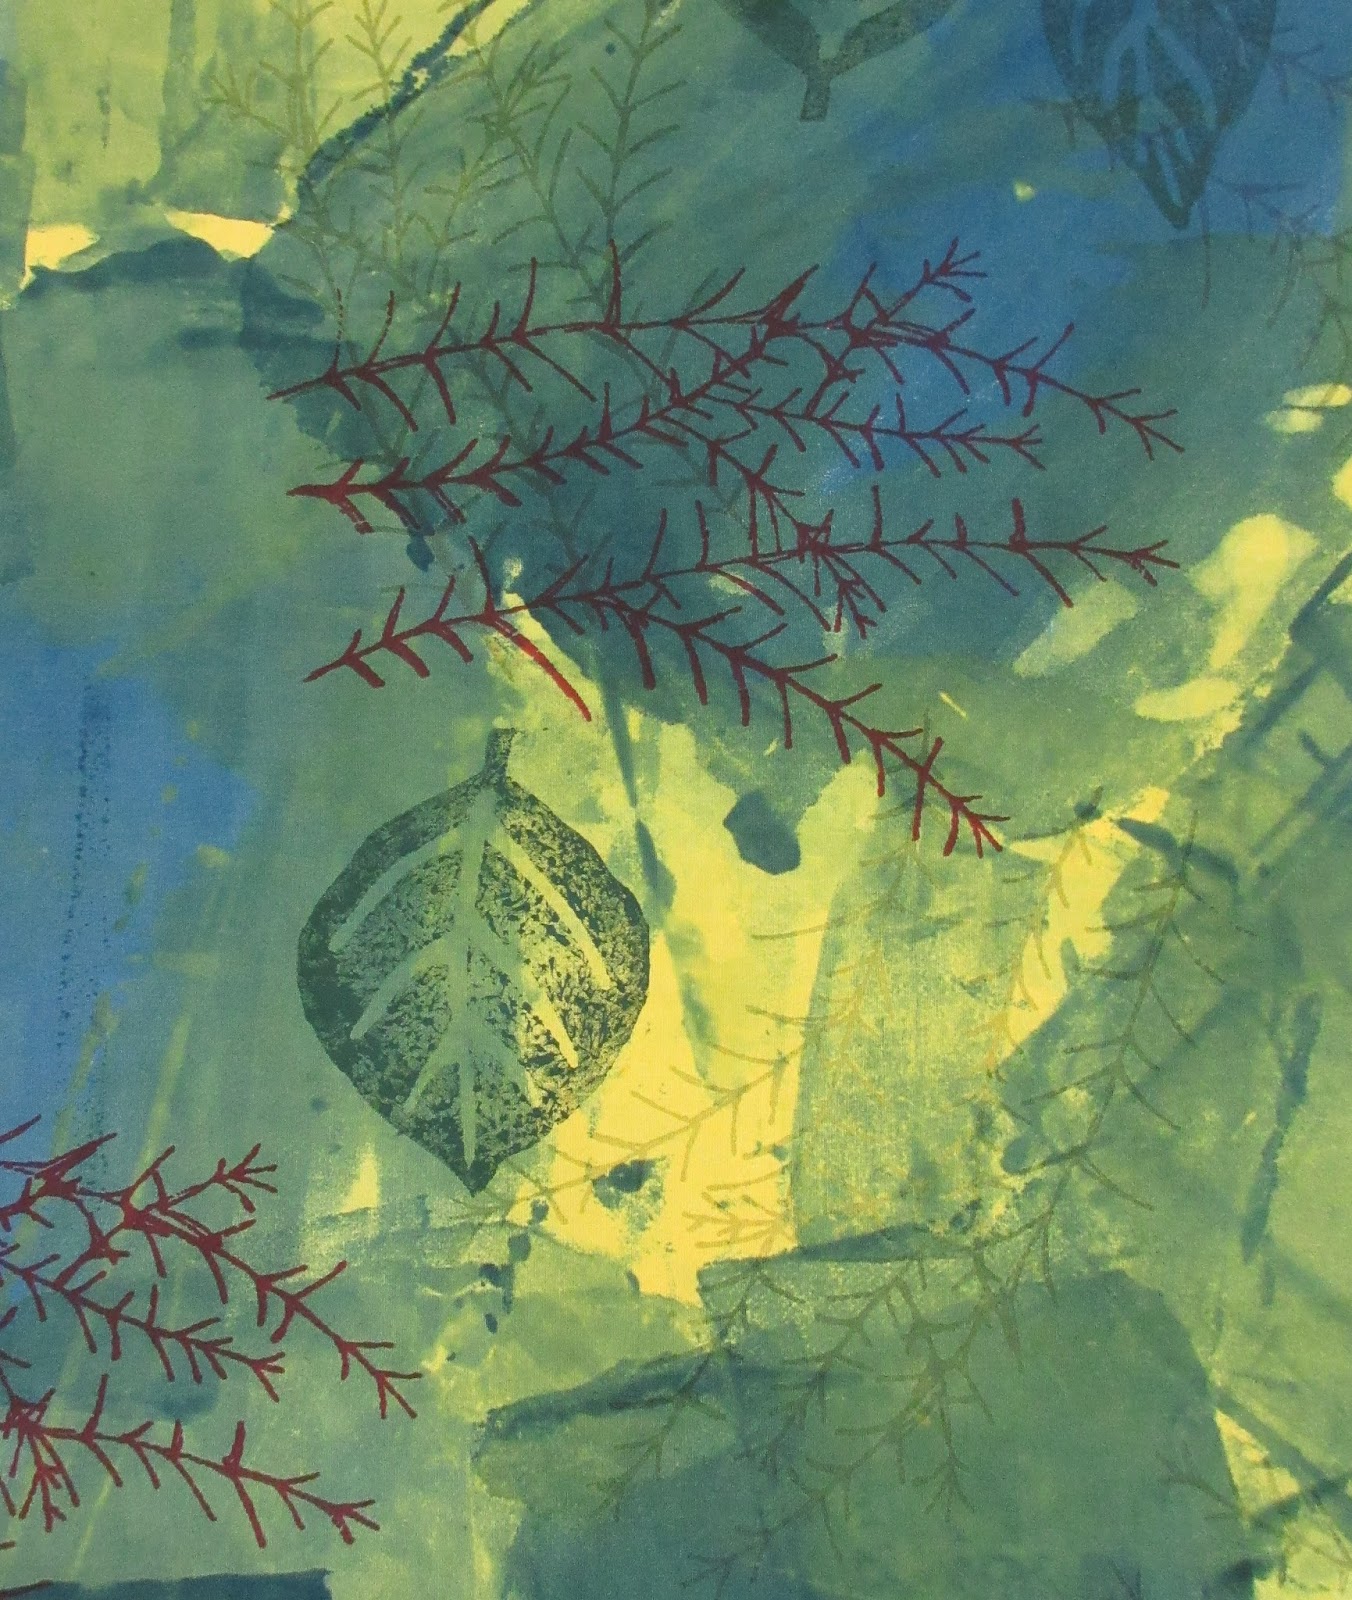
While waiting for my snow dyeing fabrics to cure I switched my energy over a different kind of experiment! I wanted to create something with screen collage. One thing lead to another and I ended up combining a few techniques: color magnet, thermofax screens, screen collage and hand carved stamps... take a peek at the journey
I started with Terri Stegmiller's wonderful Fern thermofax screen (available on Etsy). Rather than screening with paint or thickened dye I used Color Magnet (from Dharma). The idea behind this product is wherever you apply the color magnet it will grab the dye more intensely creating a tone on tone affect. 

Once the color magnet was dry I screened thickened dye across the surface of the fabric. I left the dye to set and then washed it out.The color magnet didn't show as dramatically as I had hoped so I decided it needed more! 

Next I pulled out a couple of hand carved leaf stamps and Speedball fabric paint. I really wanted to highlight Terri's Fern design more so I screened again with burgundy. 

Here is the completed 1 yard piece. The full photo looks a little washed out compared to the actual fabric. It's fun to combine techniques and let the design evolve organically without a specific plan - it's very freeing! 

Thursday, November 12, 2015

Pounded Leaves = Show Me The Color!

Just before the autumn leaves went from bright to brown I collected a handful for some "pounding"! I'm sure there is a technical term for this technique but I don't know what it is... to me it's transferring the color of a natural fiber onto another surface = pounding! 
I laid the leaves between 2 pieces of ice dyed fabric. At first I used a larger and heavier hammer but it quickly tired out my wrist. I switched to a smaller
lightweight hammer and was able to keep the pounding up! 

Here is the first peek of color - it's a little mellow. I had the leaves stored in the refrigerator for a few days before I had time for the project. I think storing the leaves may have dried them out a bit producing less color.  

I have a garden outside my studio that hadn't been cleaned up yet so I grabbed more plant material. Pounding the fresh leaves was a huge improvement. The colors leeched out quickly saving my wrist! 

Here is the final piece - yes - it's a "quiet" design but that's one of the things I enjoy about the natural world. When I look at the design it strikes me as peaceful. Remember this technique produces 2 pieces of fabric because the natural fibers are placed sandwich style between layers. That's double the fun with a twin fabric created!   
Have you tried this technique? What plant material have you used? 
Have fun creating your own piece! 

Wednesday, November 4, 2015

Painted & Dyed Canvas + Thermofax Screen = FUN!

Sometimes it takes a while to decide what you want to do with a piece of fabric! Last summer I was playing around with artist canvas and laid a gigantic piece on the driveway. I painted it in a collage style but meh... it was too bright and stiff so I set it aside. I decided to wash it to see if it would help with the softness - which it did but it still didn't excite me. Next, I over dyed the canvas with ice. This tipped the scales for my art brain to like the color palette however, I still wasn't sure what to do with it and it just didn't feel finished. 

In steps artist Terri Stegmiller with her fabulous thermofax screen designs! This design is titled "Layered Circles". If you aren't familiar with her work be sure to click here. Using her screen I stared creating a design across the surface and finally I felt like it was working. The design is only on a potion of the canvas and I'll save the rest for another time, (I wasn't kidding when I said the piece was gigantic!). 
Using Speedball screen paint I pulled the paint across the screen. I found using old hotel "keys" works perfectly for this process! 

I love the instant gratification you get when the screen is lifted!

Here is the finished piece. I do like the heavier texture and weight of canvas and will continue to experiment with it! 
What is your favorite fabric for surface design?

Wednesday, January 7, 2015

Confetti Dyed Fabric + Stencil Overlay = Let the Wild Rumpus Begin!

What fun it was to create these 2 pieces of fabric! They remind me of Maurice Sendeck's, Where the Wild Things Are. Can't you just imagine the wild rumpus taking place in this colorful forest! 


I started with a piece of confetti dyed fabric. Confetti dyeing is when you shake dry dye onto damp pre-treated fabric. You allow the dye particles to wander across the fabric surface creating unique patterns. After washing the fabric I took my latest favorite tree stencil and created repeat patterns. 

SOLD - THANKS FOR THE POSITIVE RESPONSE... I'LL MAKE MORE! Each fabric is 12" X 22" - if interested in adding a piece to your fabric stash I have 2 available at $15 each plus shipping. Drop me a line at carolreaton@comcast.net. 

Monday, December 15, 2014

Channeling Old Wood!

I was asked to create a piece of fabric that had the feel of old wood! I love the colors and textures of wood so I was excited to get started!
This is a detailed shot of the finished piece.
I hope the subtle textures and colors come through!  

I was given this photo as inspiration for the fabric by a fellow fiber artist who is creating a design with an old wood flair. If the fabric meets her needs I'll post a picture of her completed piece at a later date.  

I started by dyeing 100% cotton in a tea bath.

Next I brushed fabric paint through a screen with an old toothbrush.

To create the suggestion of wooden slats I folded the fabric and dyed with more tea.


Here is the finished piece. It reads lighter in the photo and
is actually closer to the color of brown tea. 
Creating fabric for other artists is rewarding and challenging! Artists typically have a vision in their head about what they want. Interpreting their ideas onto fabric and having the end result match their vision is the challenging part. When I get it right I'm ecstatic and if not it's more discussion and back to the studio! 

Monday, June 30, 2014

Art Foamie Stamps - if it doesn't move - stamp it!

What a fabulous mantra... if it doesn't move  - stamp it! I recently discovered this cool creative arts business located in Canada. Art Foamies founder, Emmie Roelofse is a fabric painter herself and the business grew from her desire to create stamps from her own designs! 

Look at this awesome box-o-fun that arrived in the mail! Art Foamies ships anywhere in the US and Emmie is a treat to work with. What I love about this product is the thickness and texture of the stamps. It is sooo easy to work with and allows even a novice stamper (such as myself) to get great results. I've never come across stamps like this before and I encourage you to take a peek at the website

I quickly decided to use Color Magic by Jacquard with the stamps. Color Magic is a curious product; when applied to fabric and dyed any area with Color Magic will be super saturated with color creating a secondary pattern. You can stamp, paint, screen or apply in any way your imagination takes you - but that is another post! 

I planned to ice dye the fabric once the Color Magic dried and I was so focused on the stamping layer that I forgot to pretreat the fabric with soda ash and water... duh! Unfortunately the ice dye results were less bright and intense than I had planned.This is NOT the red/orange I was looking for but the bird is very sweet! 
Not to be deterred I plunged forward using Speed Ball fabric paint. I can't stress enough how easy this stamp is to work with. Just look how it sits up high accepting the paint without me having to even hold it!

Press lightly...

Lift...

Repeat!

I've got a whole gaggle of funky little birds racing across the fabric surface! What a fun project! I tried out every stamp in my box-o-fun so check back for more posts this week!